February 26, 2004 - HS Skins
It's time to get the skins ready for riveting. First step is to remove the blue plastic covering. You could just peel all the plastic off. But it's kind of cool looking to just remove the plastic along the holes, and leave the rest on to prevent scratches. The best way to remove the plastic along a straight line is to use a soldering iron. It's very slow, though. I counted 3 seconds per centimeter. It took that long to burn through the plastic. Grind the tip of the soldering iron to a smooth round-shape so you don't scratch the metal.
Then each hold needs deburring, top and bottom. Deburring is easy, until you realize you have hundreds of holes to deburr. Can you say -- drudgery?
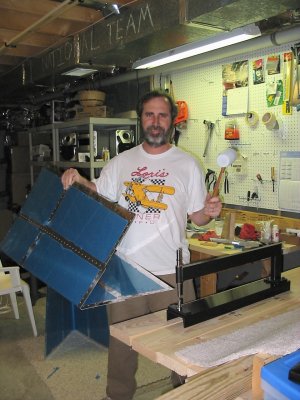
Then each hold needs dimpling. The edges are easy because you use the hand squeezer on them. The interior holes require the C-Frame. The rubber hammer is used to tap the dimple die down on the skin. It makes a pretty good dimple though. Lynnette helps me with the C-Frame dimpling; it's a two-person job to keep the skin perpendicular to the die and to not scratch the skin on the die when moving from hole to hole.