December 27, 2004 - Riveting the Flap
|
|
OK, the deburring, edge smoothing and dimpling is complete and the flap is
ready for riveting. First I cleco the thing back together.
Then I remove the spar so that I can get access to the inside of the flap
with the bucking bar. |
|
 |
|
|
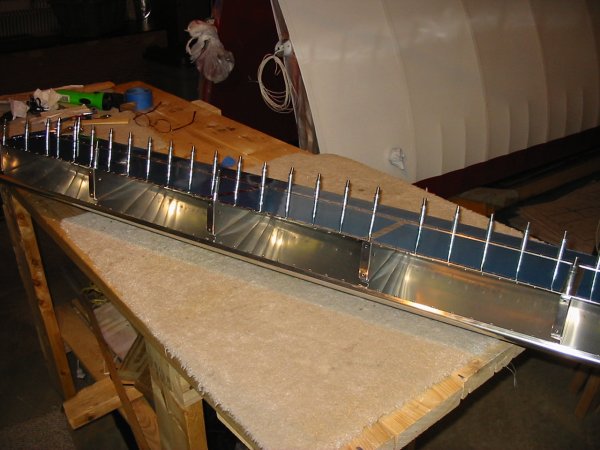
The instructions seemed to warn about building twist into the flap.
So I decided to build a little jig. It took less than an hour to
build, since I already had practice building one for the wing leading
edge. I can't imagine doing the flap riveting without it.
When the riveting was complete, the flap was straight and true.
|
|
 |
|
|
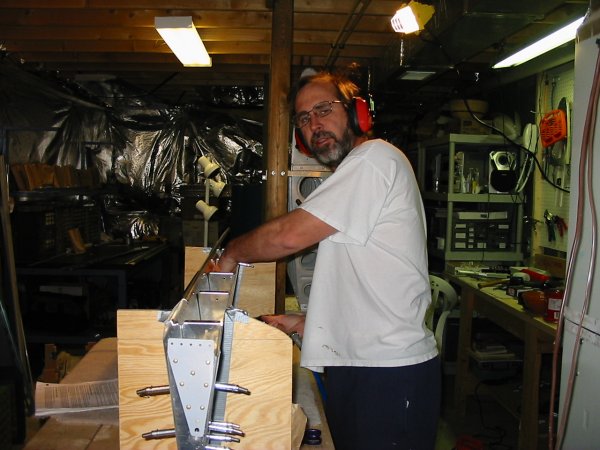
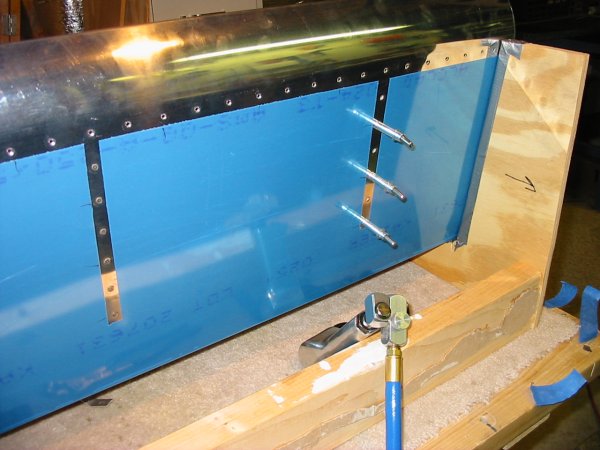
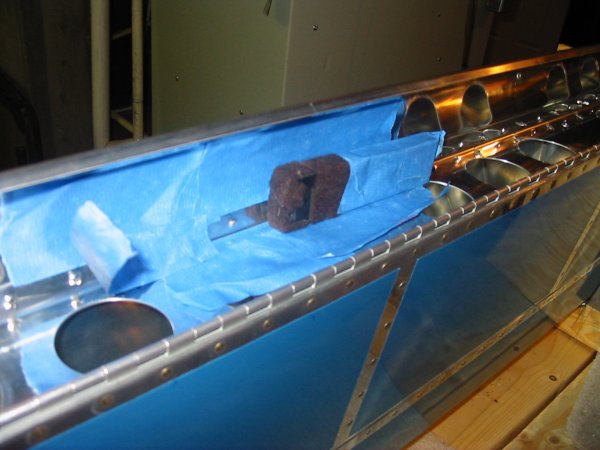
First I riveted the top and bottom skins to the rear (virtual) spar.
It was a challenge. My solution was laying my rectangular bucking
bar alongside the rivet shop head and pressing it with two fingers.
I used lots of blue masking tape to prevent the inside of the spar from
getting scratched up. The rivets came out well, to my surprise. |
|
 |
|
|
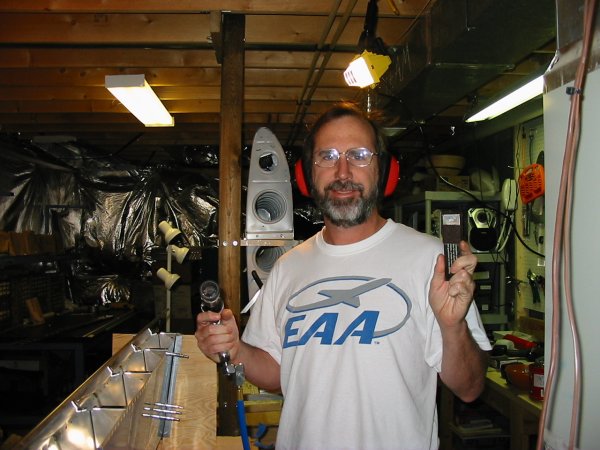
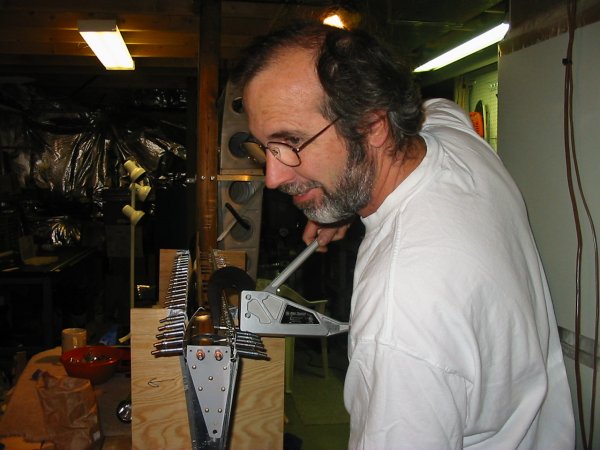
The riveter. I have my homemade rectangular bucking bar in my left
hand. It is a rectangular, 1/2 inch thick, polished steel bar --
one of those ornamental paperweights that companies give away with its
logo on it. I don't know how I would have riveted the flap without
it.
|
|
 |
|
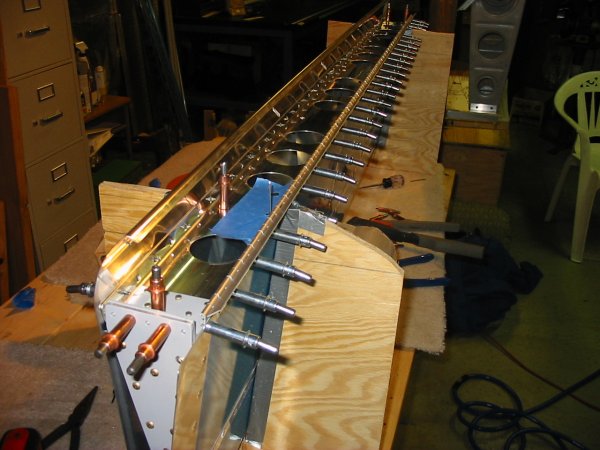
| You can see the virtual spar rivets
at the bottom from left to right. After that I riveted the top and
bottom skins to the ribs. I had to use my rectangular bucking bar for
this as well. Again, use lots of blue tape to protect the skin and
ribs. |
|
 |
|
| Riveting the skin to the ribs. |
|
 |
|
|
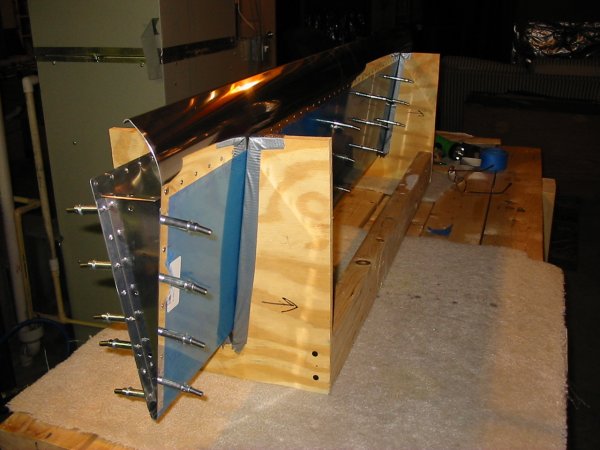
Next, I cleco the spar back into the flap, along with the hinge, which
goes inside of the lower spar flange. |
|
 |
|
|
At first, I was alarmed because I could see no way to use a bucking bar
on the spar bottom flange. Then I realized I could use the hand
squeezer. No problem.
|
|
 |
|
|
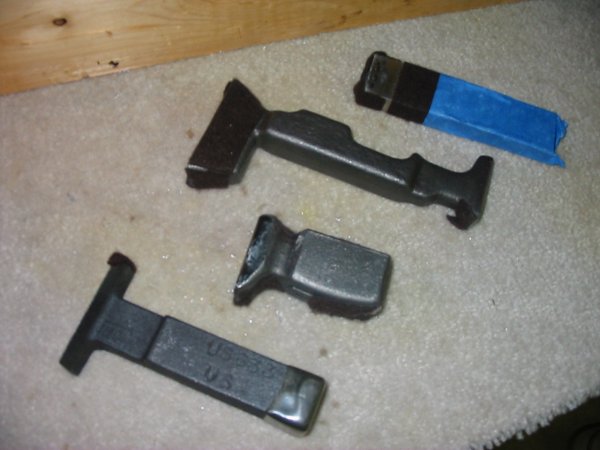
These are my four bucking bars. I use the second from left the most.
The rectangular bar on the right was indispensable for the flap. I
bought the bucking bar on the left at Oshkosh this last summer for the
specific purpose of riveting the trailing edge ribs where it gets very
narrow. Previously, I used pop-rivets, but with this bucking bar, I
can use AN426 3-x flush rivets. Got a good buy on it at Oshkosh -
$6. Bucking bars are tough to buy through catalogs or online because
it's hard to tell if what you are getting will do the job. |
|
 |
|
|
The next step was to rivet the top skin to the top of the spar flange.
Again, the only way I could do it was use my rectangular bucking bar.
You can see how much tape I have to use and how the bucking bar just lies
parallel to the spar flange. Two fingers on the bucking bar worked
well. The shop heads came out nice.
|
|
 |
|
| Flap complete. The plans say
the flap is the "easiest" control surface to build. I wish they hadn't
have said that, because it gets your hopes up, and then in my case, it just
simply wasn't true. The flap riveting was some of the most challenging
I've encountered so far. I spent at least 9 hours riveting this sucker
together. |
|
|
|
|
|
|
|